Getting Signed Up Quickly
This guide will lead you through the signing up process.
- Step 1: Selecting a plan
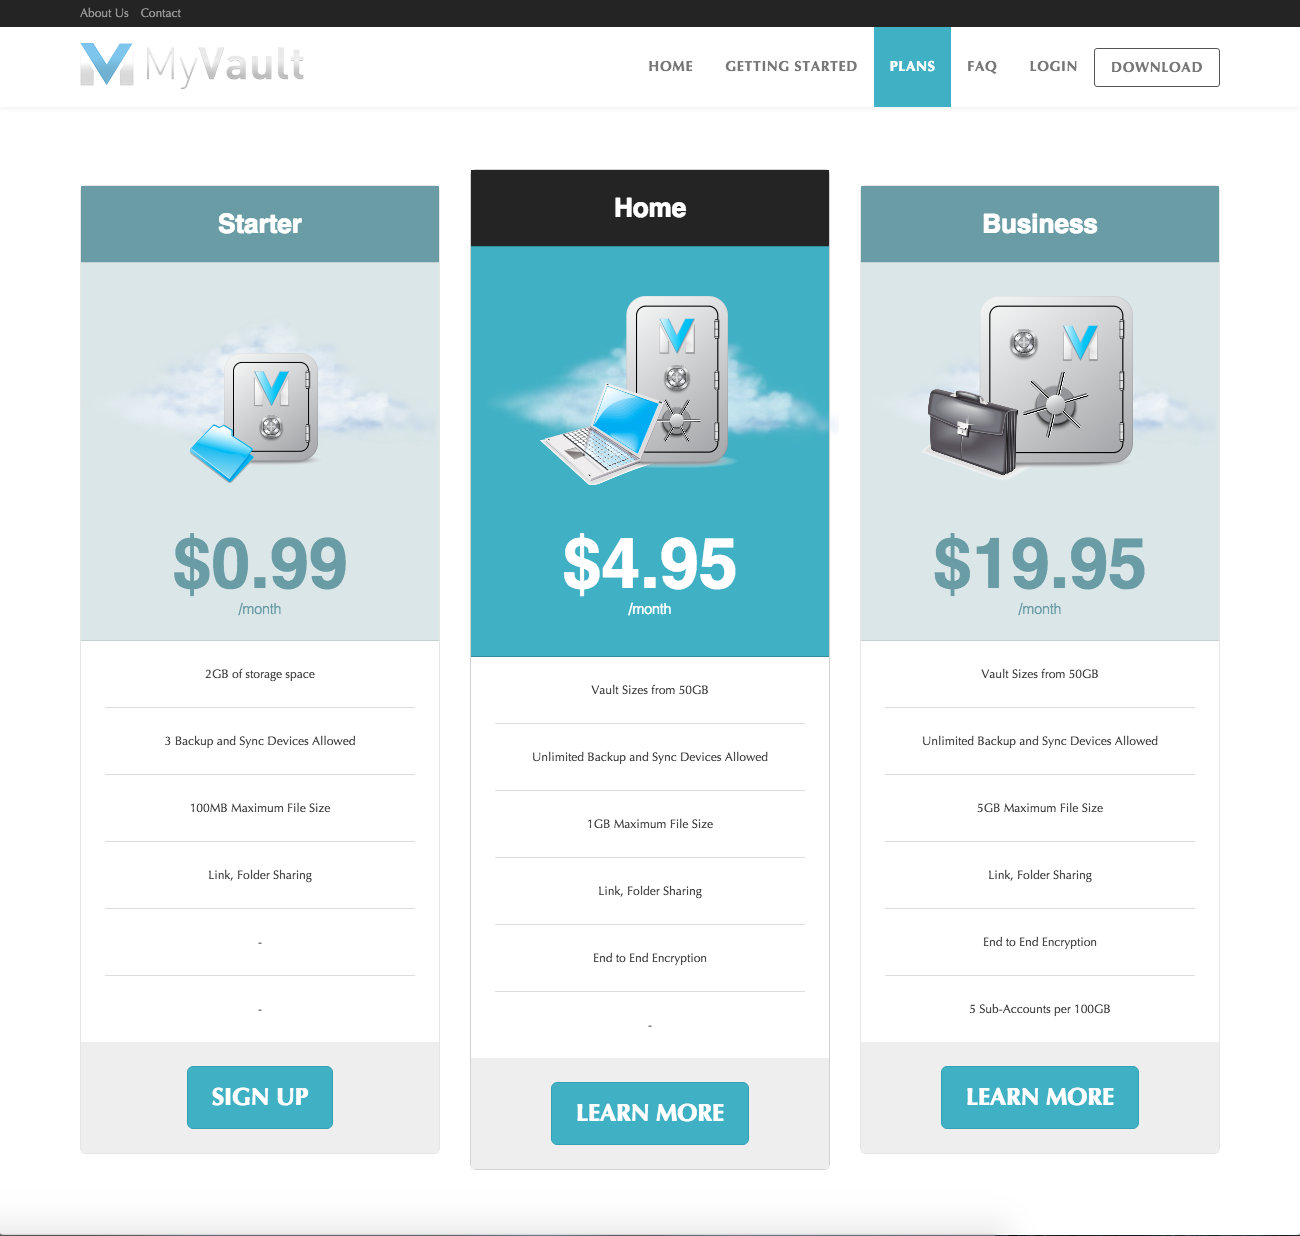
Go to the plan page. and determine which plan is best for you. Learn more about Home and business plans by clicking on the respective "Learn More" button.
For limited storage needs, click on sign up for Starter plan for just 99c per month. For more extensive needs, and mostly for home use, choose one of our home plans. To use MyVault for business purposes and if you need sub-accounts for colleagues and employees, choose one of our Business plans.
The best guideline for choosing a plan is to choose a plan based on how much storage you expect to use. If you are using it for business purposes, the number of sub-accounts and some other features also plays a role.
- Step 2: Complete the Signup Form
After selecting the plan that suits your needs, get your 30-day free trial vault by clicking the button next to the plan you want. You will be taken to the following sign-up page
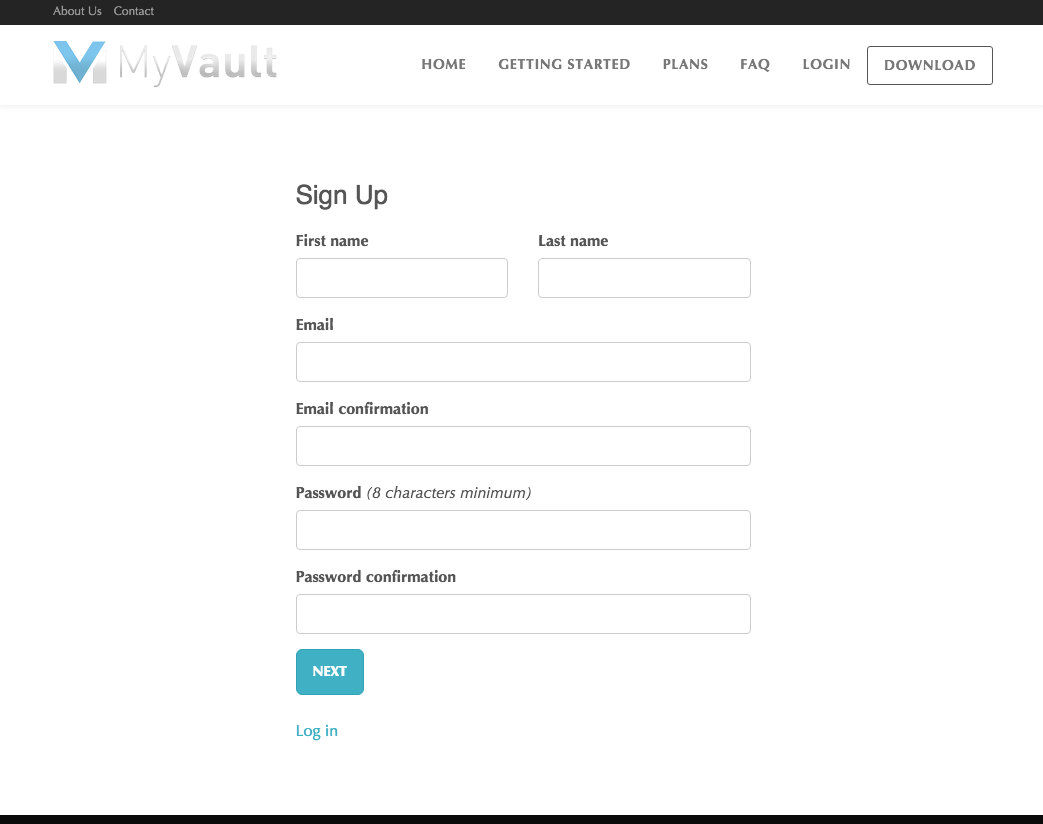
Fill out your details, making sure to select a secure password. Click on next.
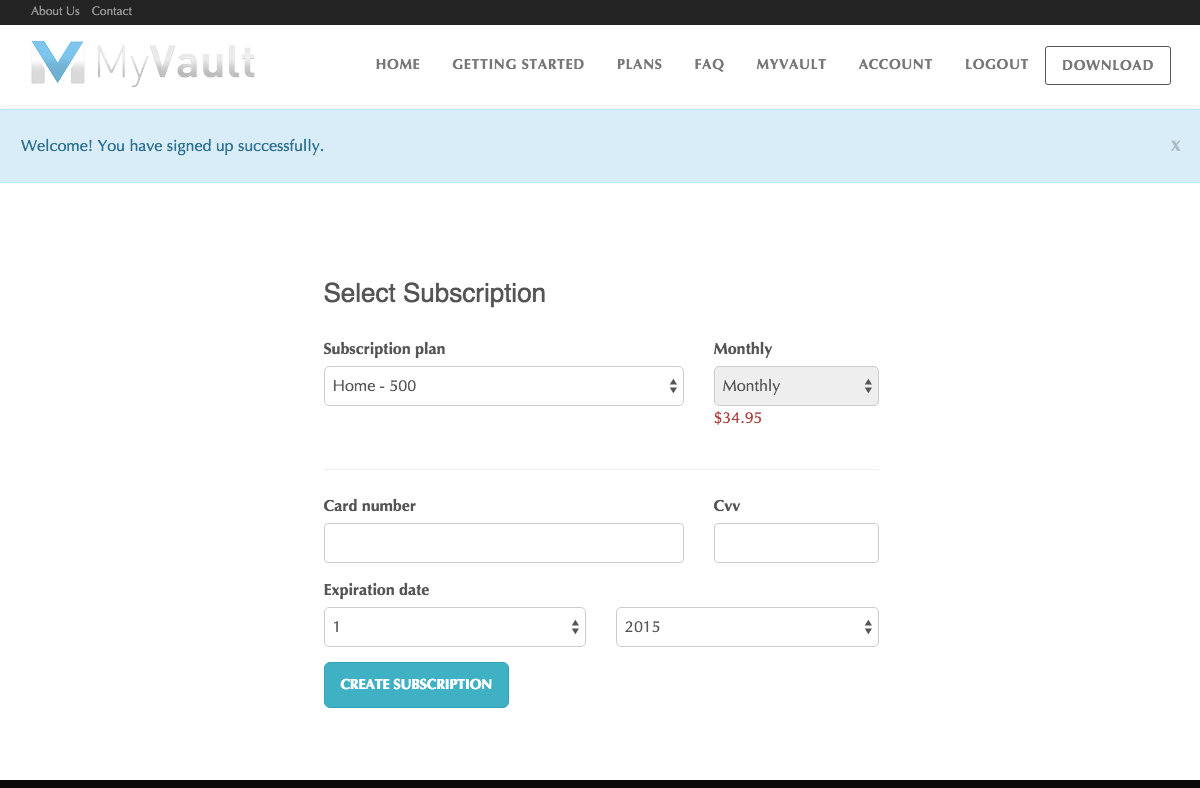
- Step 3: Complete the Payment Information
Your account has already been created as is waiting for you. All you have to do is complete the payment information and click on the "Create Subscription" button. You may also change the plan you want on this page.
- Step 4: Download the Application
After completing step three carefully, you should get a pop-up message allowing you to download the app onto your PC/MAC. Click on the appropriate button for you. If you did not get the pop-up message, click here
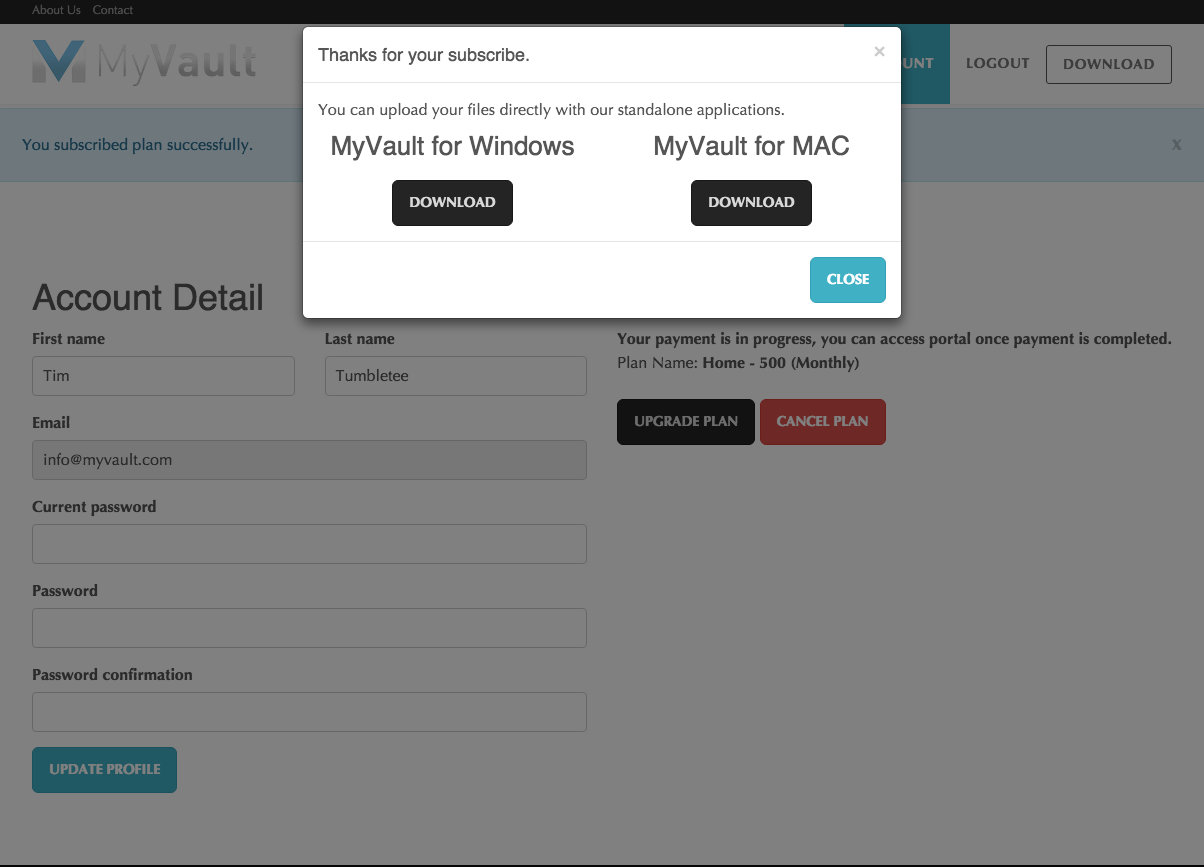
Click on the appropriate button to download the app.
- Step 5: Install the App
Open up the downloaded app and follow the installation instructions. For more help on getting started after this point, go to Getting Started Step-by-Step Guide
Getting Started – Step-by-Step Guide
This easy to follow guide will help you through the setup and installation process. Note that you have to have signed up for an account before you can use the software as the software requires a valid account.
- Step 1
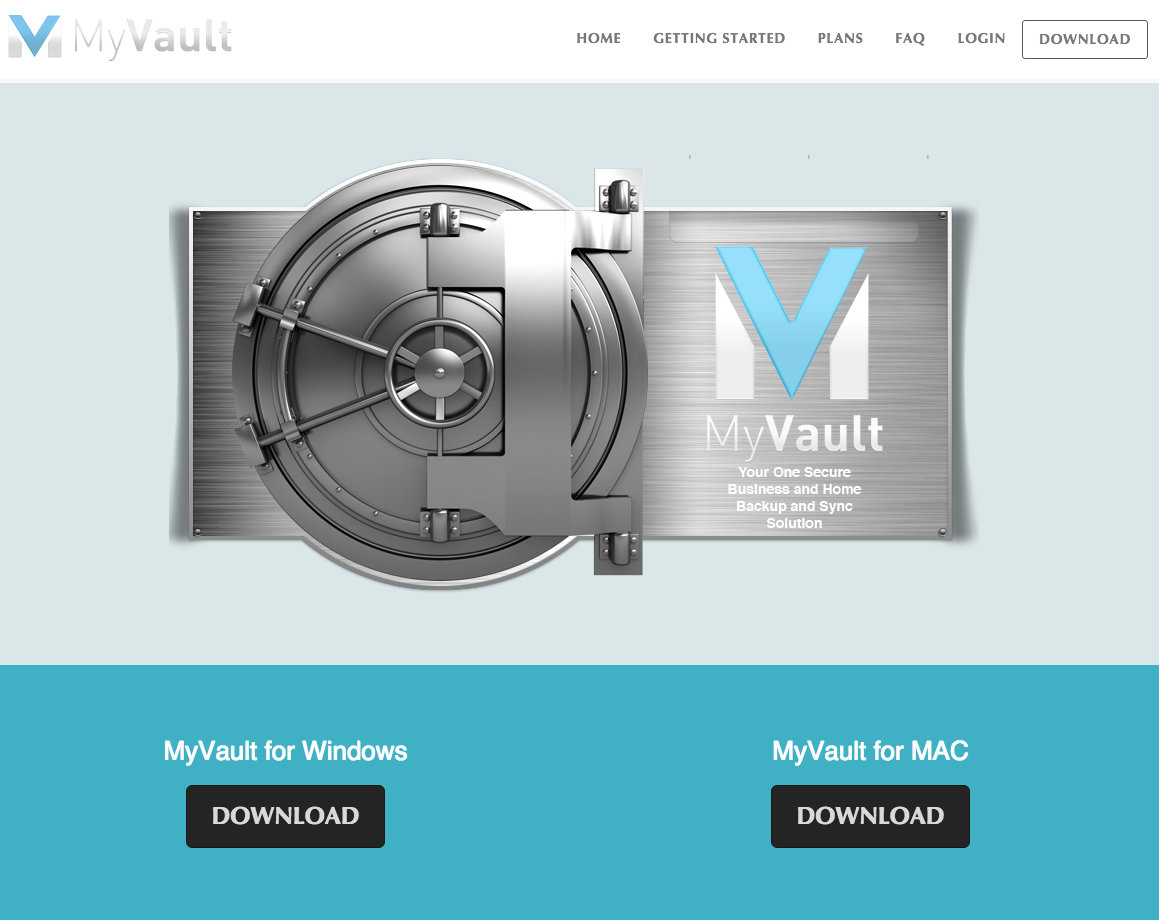
Sign up for an account. If you already have one, go to the next step. If you need help signing up for an account, click Getting Signed Up Quickly. To sign up for an account click on the image below to select a plan type to suit your needs.
- Step 2Download the MyVault® app on your PC/MAC from here. If you have already downloaded the app onto your computer, go to the next step.
- Step 3Install the MyVault® app on your PC/MAC. Do this by opening the downloaded file and following the on screen instructions. Grant permission for MyVault to open/operate on your system (this is automatically requested by your system).
Mac users may need to do the following: locate the download in Finder. Right click the downloaded file and click on open. Grant any permissions necessary for MyVault to function. - Step 4
Open the installed MyVault application on your PC/MAC.
Installer on a Mac

- Step 5
Sign in using your email and password created when you signed up for an account (Step 1)

- Step 6
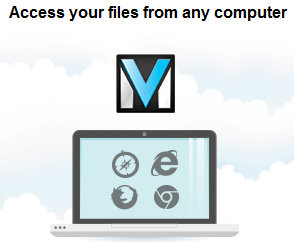
You are now ready to use your MyVault vault to backup, sync and share your documents. For more information on backup, sync and share functions, click here.
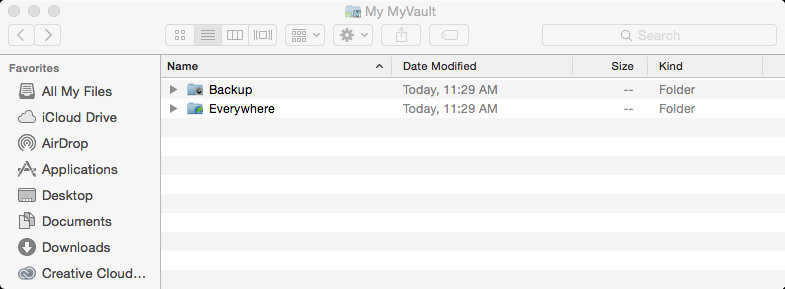
Mac Folders
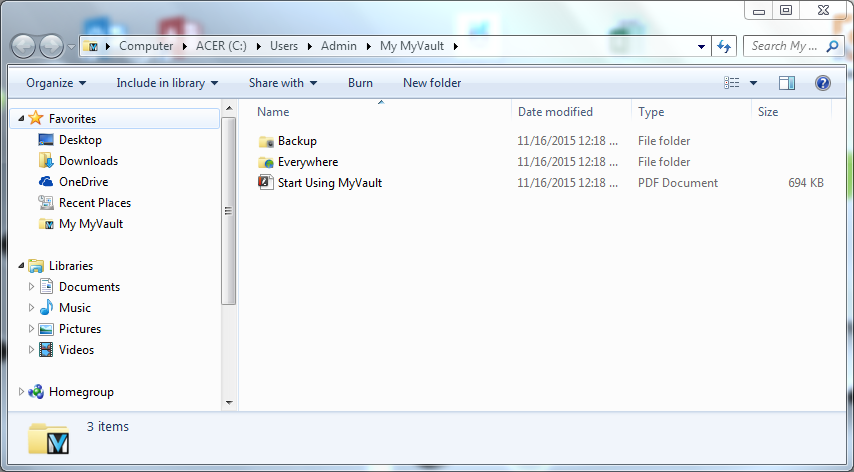
Windows Folders
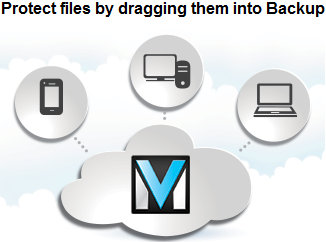
To backup a file/folder, drag it to the backup folder. To sync a file/folder, drag it to the everywhere folder.
Backing Up and Syncing
After installing the MyVault software, your computer has a MyVault® folder. Inside the MyVault® folder there are two folders and a PDF file. The PDF file is a quick guide to how to start using MyVault®. The two folders are named “Backup” and “Everywhere.” If you have not yet downloaded and installed the MyVault vault onto your computer, click here to download it.
Windows Folders
Mac Folders
To backup a file or folder, drag it to the “Backup” folder. To sync a file or folder, drag it to the “Everywhere” folder. The difference between backing up and syncing is explained below.
- Backing Up
For files that you want backed up but that you don’t want to sync to all the different devices on which you have installed MyVault®, use the “Backup” folder. This option is useful for files and folders that you only need on one device (e.g. work-related files on a work computer) and not on all your devices. Of course, these files may still be accessed and managed by you at any time from any device by logging into MyVault® website.
- Syncing
For files that you want to synchronize between all your devices, use the “Everywhere” folder. This option is useful for files and folders you would like on all your devices, such as music, pictures, or even work-files when you work off multiple devices.
Back Up from the Website
The easiest way to back up is by dragging files and folders that you want backed up to the "Backup" folder in your MyVault folder. If you would like to manually set the folder over the web you can do so as follows.
You can backup and sync your files from the website, or from your desktop. This guide shows how to do it through the web-portal. To learn how to do it through our desktop application click here .
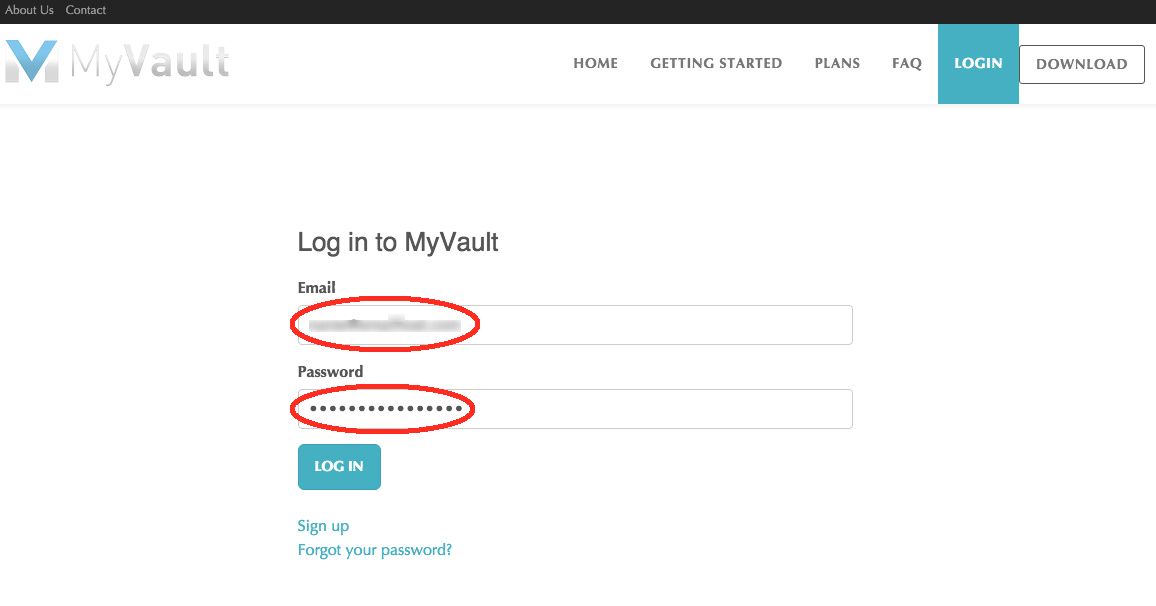
- Step 1: Login
Log in to your MyVault Account online by going here and filling in your username and password.
Login Page
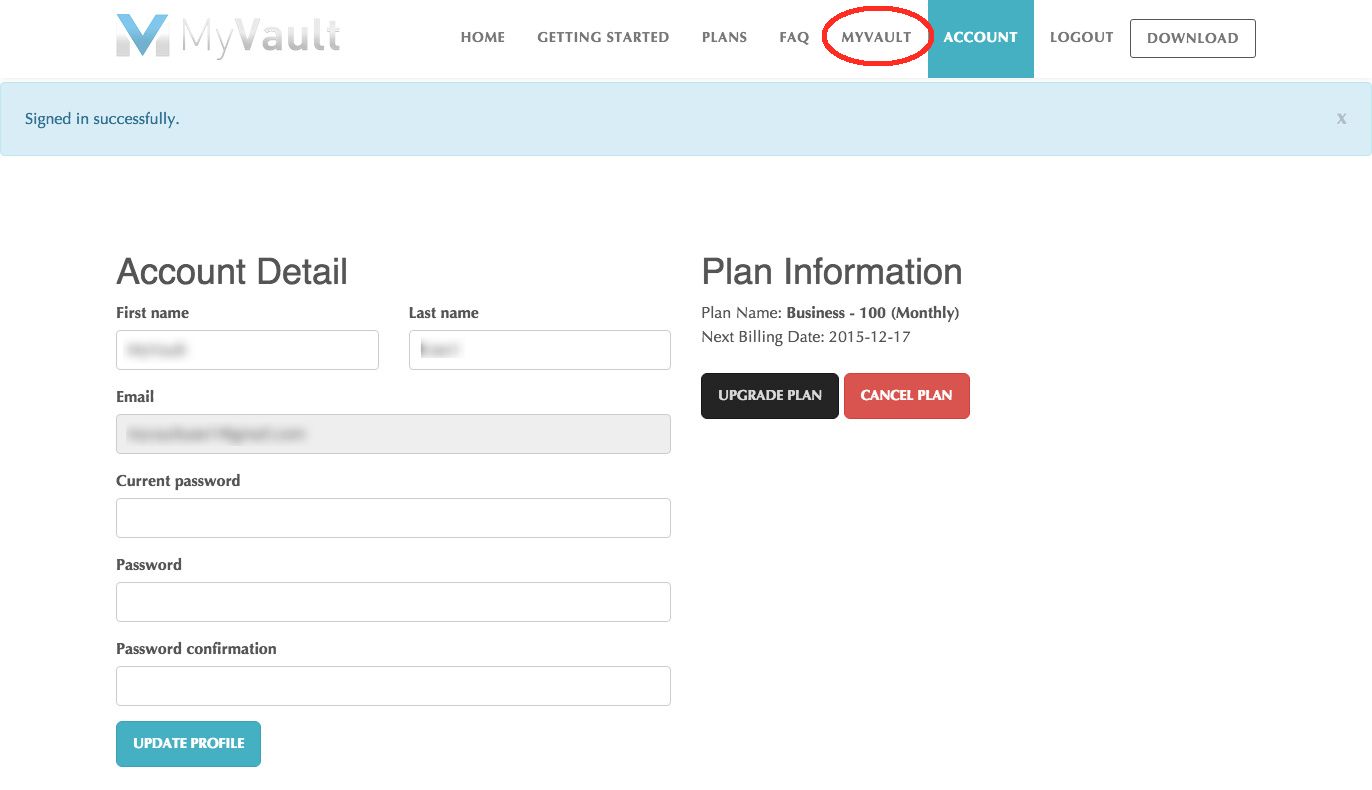
- Step 2: Go Inside MyVault
Click on the MyVault Tab at the top of the page
Account Page
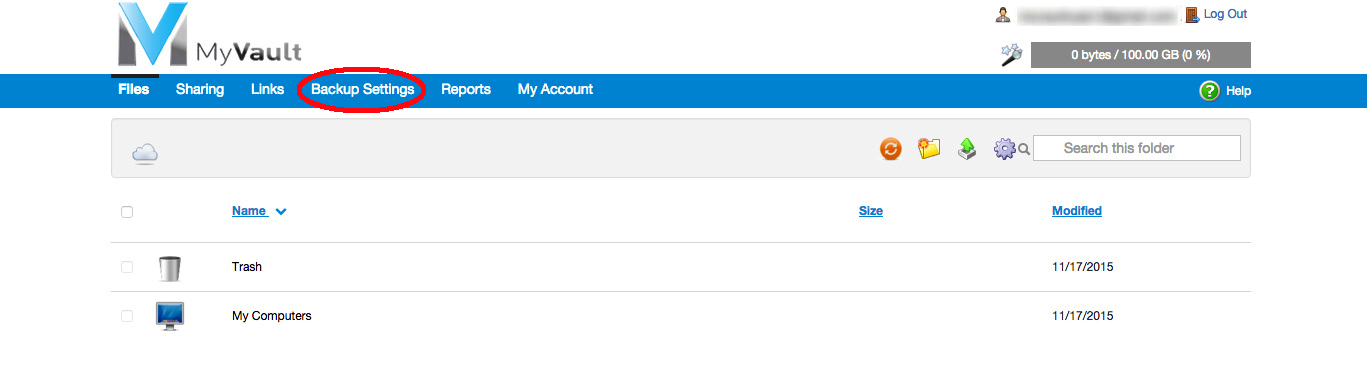
- Step 3: Go to Backup Settings
Click the "Backup Settings" tab
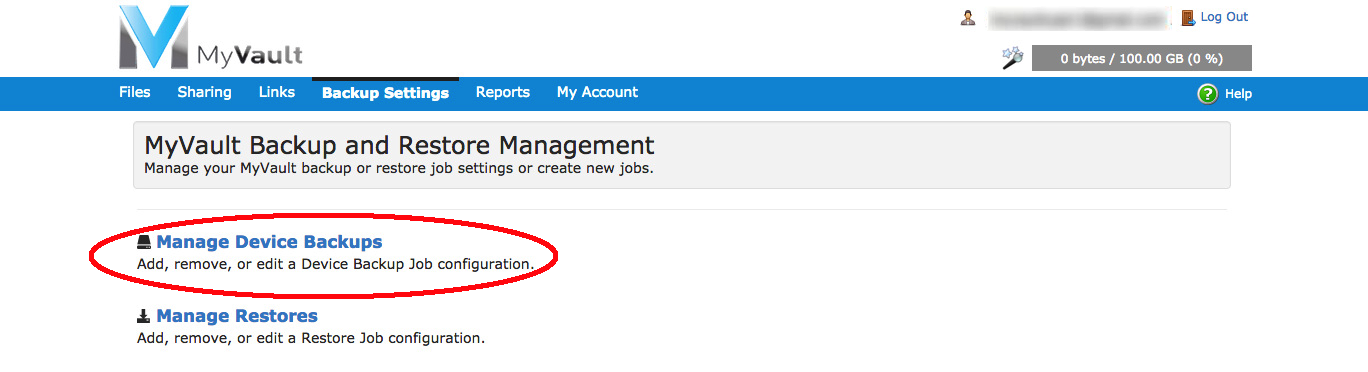
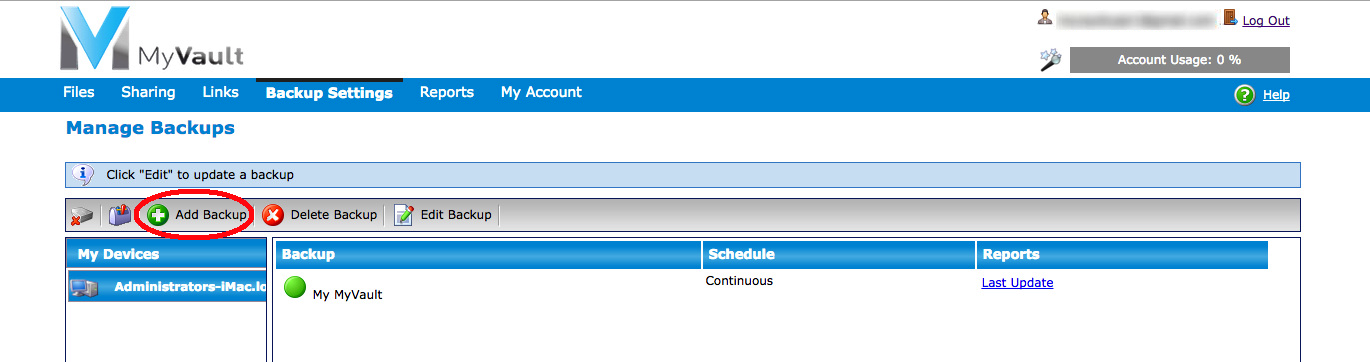
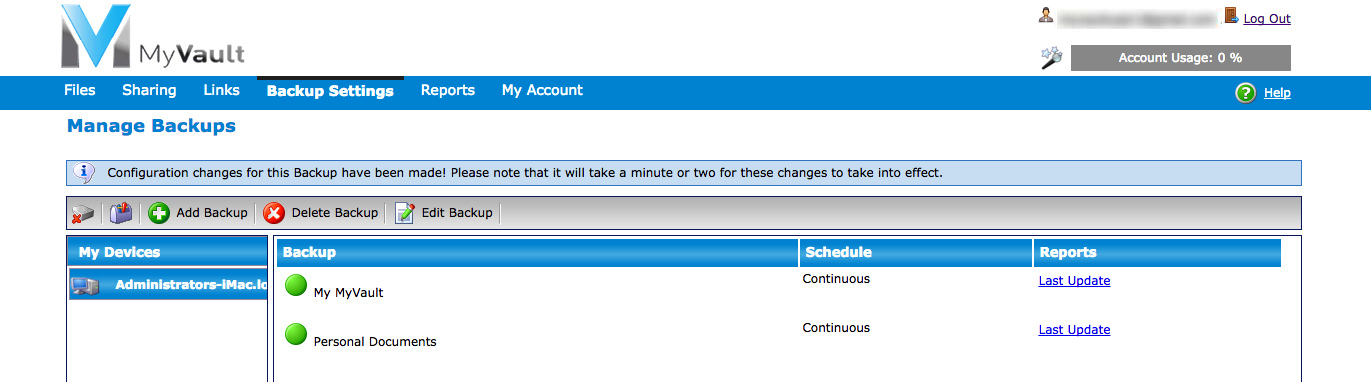
- Step 4: Manage Your Devices
Click the "Manage Device Backups" link
- Step 5: Add a Backup Job
Click "Add Backup"
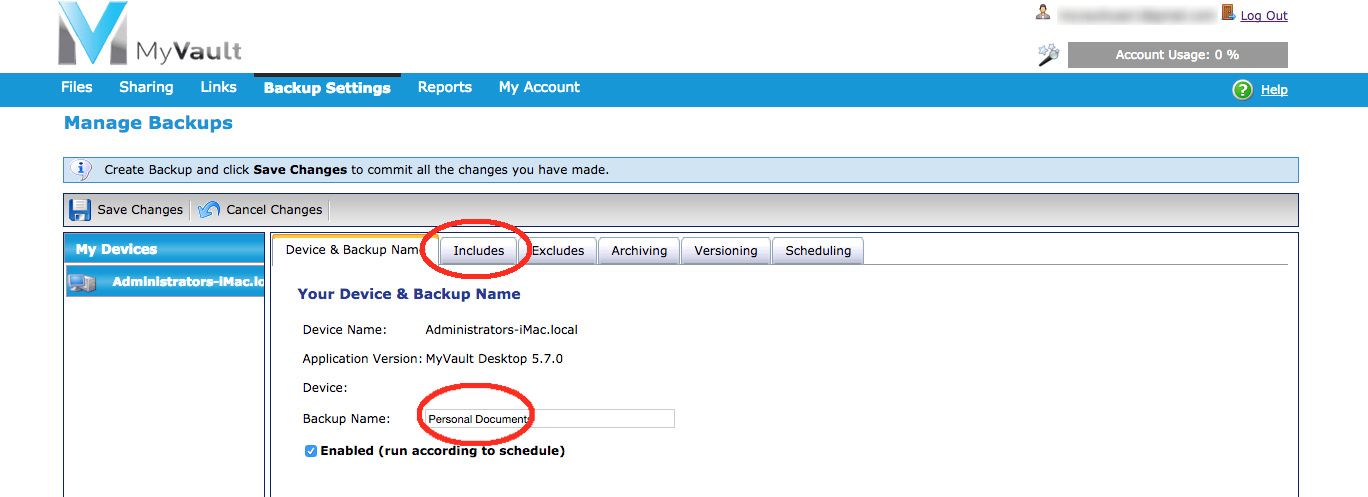
- Step 6: Name Your Backup Job
Give your backup a name and make sure the button next to Enabled is checked. When you've done this, click the "Includes" tab
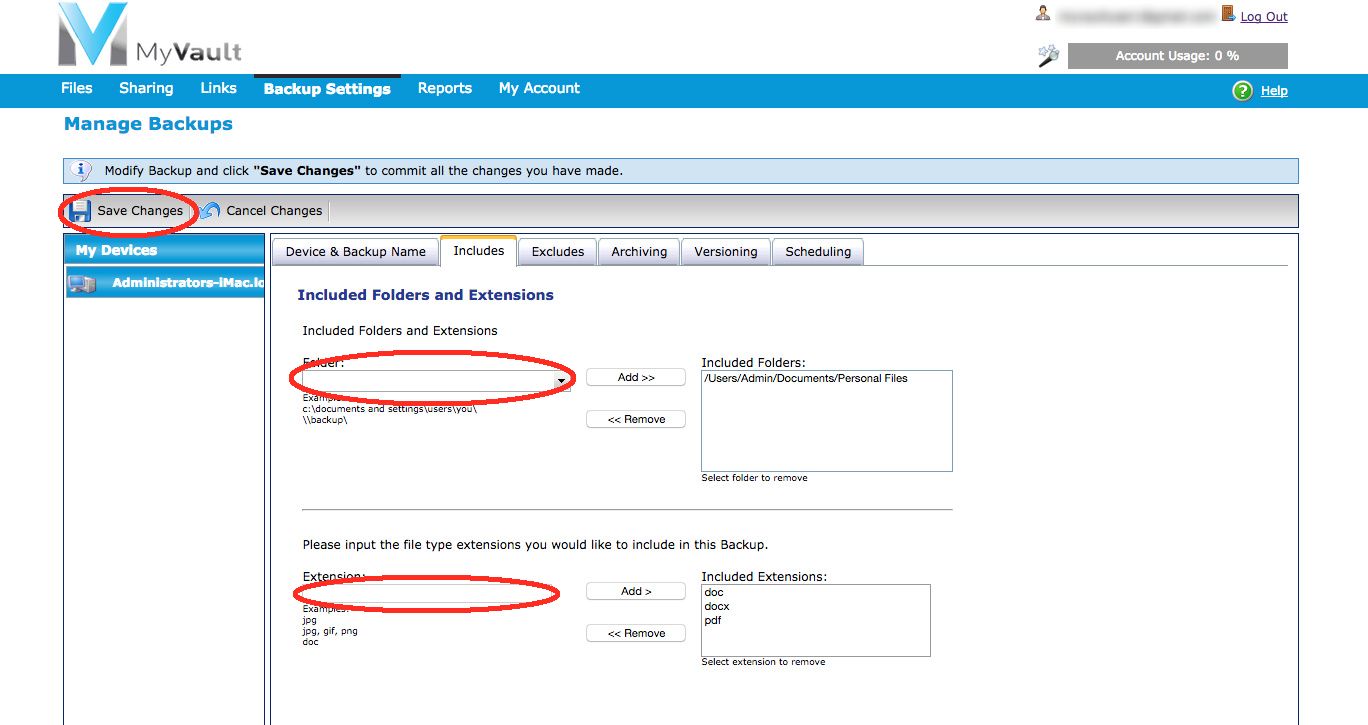
- Step 7: Select Which Folders to Include; Which File Types to Save
In the folder box, type or paste in the path of the folder you want to backup. Click on "Add." You can also set what types of files in the folder to backup in the "Extension" box by typing in the extension of the files you want to include. Remember to click "Add" to include them.
You may also add other features such as excluding certain folders, setting archiving and versioning rules and scheduling backups by clicking on the respective tabs.
- Step 8: Save Your Changes
Remember to click on "Save Changes"
Completed Adding a Backup
Back Up from the Desktop
Backing up your files from the desktop is a simple straigh-forward process. In order to do this you should already have signed up and installed the MyVault application for PC or MAC onto your local computer. If you haven't done this yet, click here for our easy installation guide.
- Step 1
Double click on the MyVault icon on your desktop. Log in using your MyVault name and password. If you have already signed in you can go to the next step.
- Step 2
During the installation process, a folder should have been created for MyVault. Inside this folder there are two other folders: Backup and Everywhere.
To backup a file or folder, simply drag it to the Backup folder. On a PC you can also select and right-click on any folder and select to back it up using MyVault.
To sync a file or folder, making it available to all devices on which you have installed MyVault, simply drag it to the Everywhere folder.
Windows: MyVault Folder
Mac: MyVault Folder
- Step 3
You're done.
You can fine-tune your backing up and syncing, by changing the archiving and versioning rules, by selecting the types of files within a folder to be backed up etc. However, for basic backing up and syncing, this is all you need to do.
Sharing a Folder
Two things before you share a file/folder?
The folder that you want to share has to be inside your "Everywhere" folder. Sharing a file that is only in your "Backup" folder is not possible since, for security reasons, backing up works differently than syncing which is used when sharing files.
To share a folder via MyVault, with another person, that person has to have a MyVault account. This is for security purposes. You may however share individual files easily without having the other person having a MyVault account.
How to share a folder
- Step 1: Log In to MyVault
Log in to your MyVault account online by going here
- Step 2: Go Inside MyVault
Click on the MyVault Tab at the top of the page
Account Page
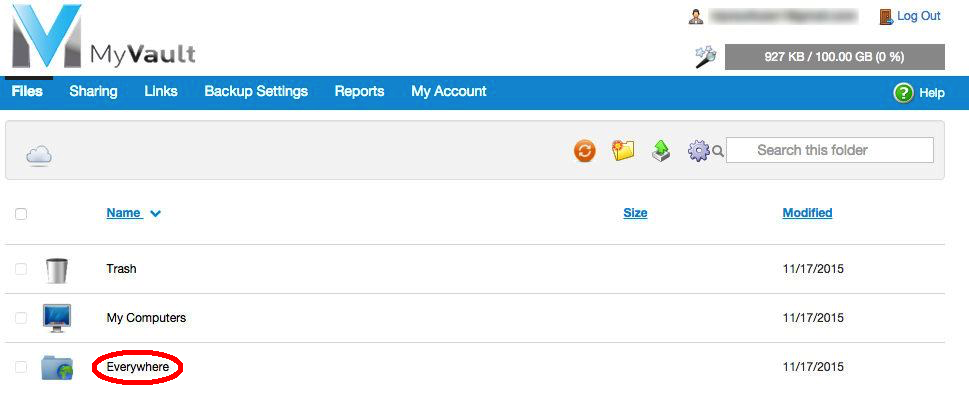
- Step 3: Select Everywhere
Click on Everywhere
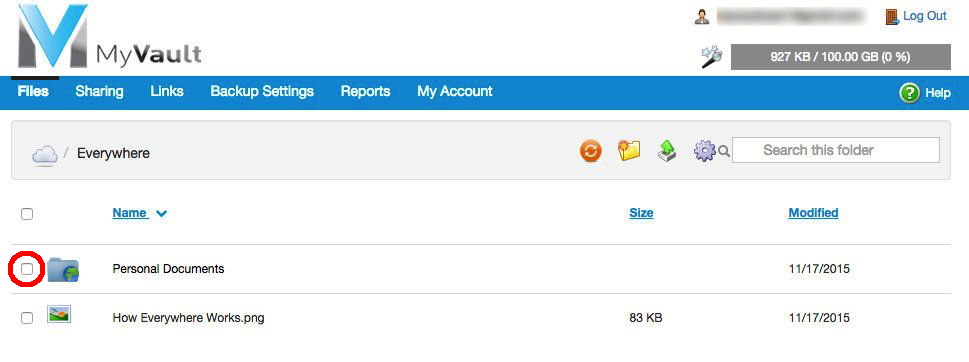
- Step 4: Select Folder to Share
Select the folder that you want to share. In the image below we are going to select the "Personal Documents" folder to share with a colleague or friend.
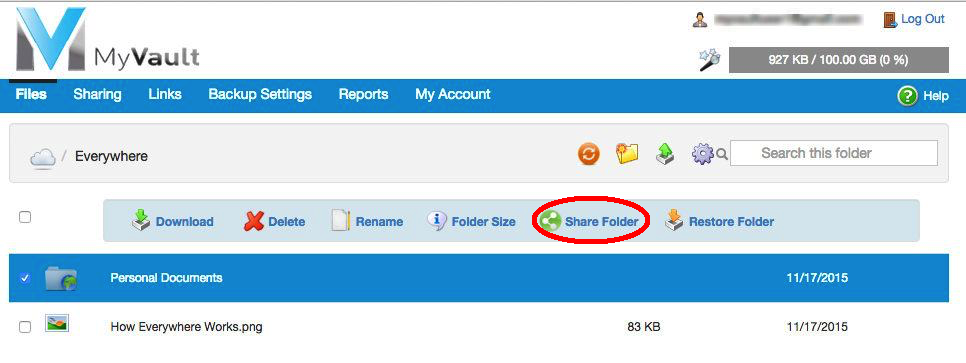
- Step 5: Start the Sharing Process
After you have selected a folder, click on "Share Folder."
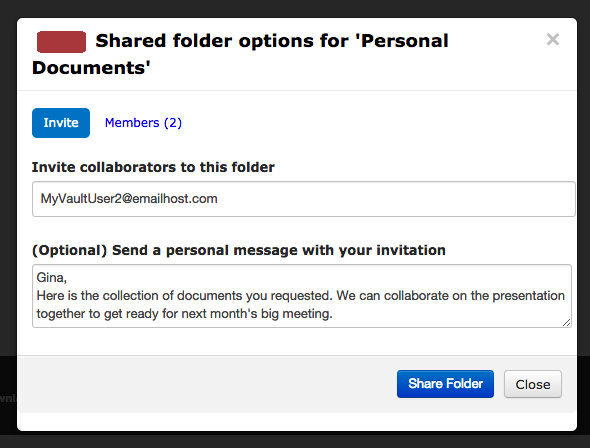
- Step 6: Enter Collaborator's Details
On the window that opens, enter the email address of the person or people that you want to share the folder with. The email address has to be for a person who has a MyVault account, otherwise they won't be able to view the folder.
You can also add an optional message that the person/people will recieve along with their link to the folder.
- Step 7
Click on "Share Folder"
- Step 8
You're done! People who you've shared the folder with will be sent an email notifying them that you've shared a file.
What is "archiving"?
When you delete a file/folder from a local device (i.e. your laptop, or PC or MAC) it gets marked as “archived”. A file is also archived if you move the file to a different folder or you change the name of the file. Archived files are still available via logging into MyVault® via the web for a time. The time that files are available online after being deleted can be adjusted by setting the rules for archiving (see below). This allows you to undo accidental deletes.
How to set archiving rules?
- Step 1: Log In to MyVault
Log in to your MyVault account online by going here
Login Page
- Step 2: Go Inside MyVault
Click on the MyVault Tab at the top of the page
Account Page
- Step 3: Go to Backup Settings
Click on on Backup Settings Tab
- Step 4
Click on Manage Device Backups. This will take you to a list of your backup jobs.
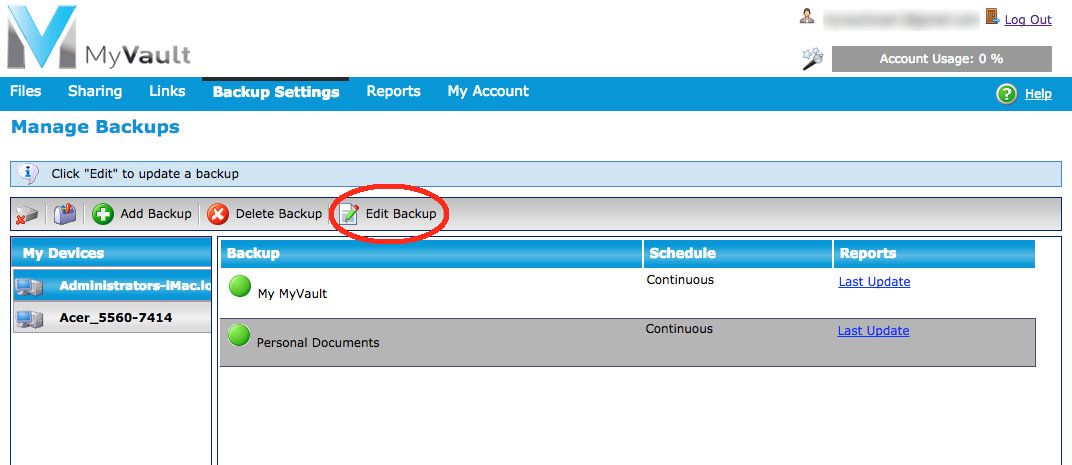
- Step 5
Click on the backup job for which you want to change the rule, to highlight it. Then click on the Edit Job button in the toolbar.
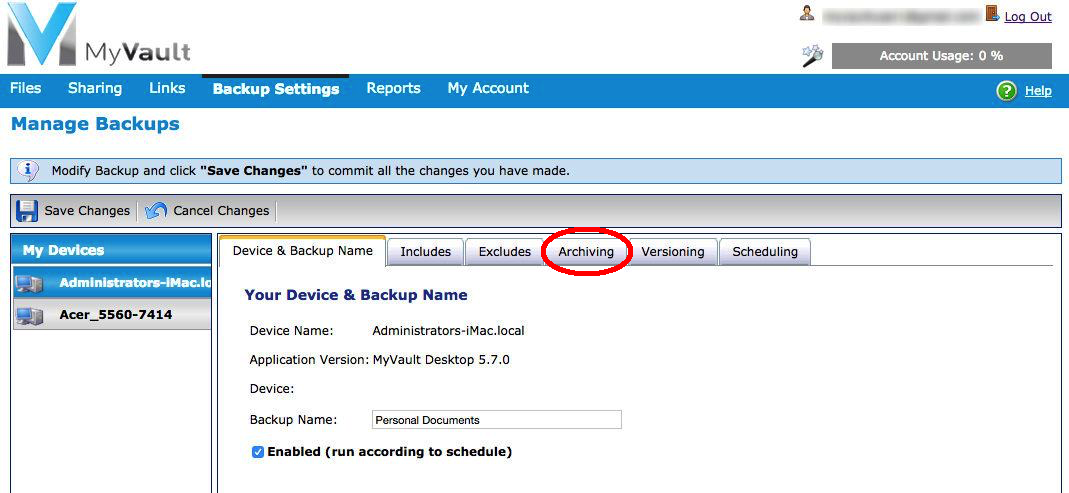
- Step 6: Go to Archiving Options
Click on the Archiving tab.
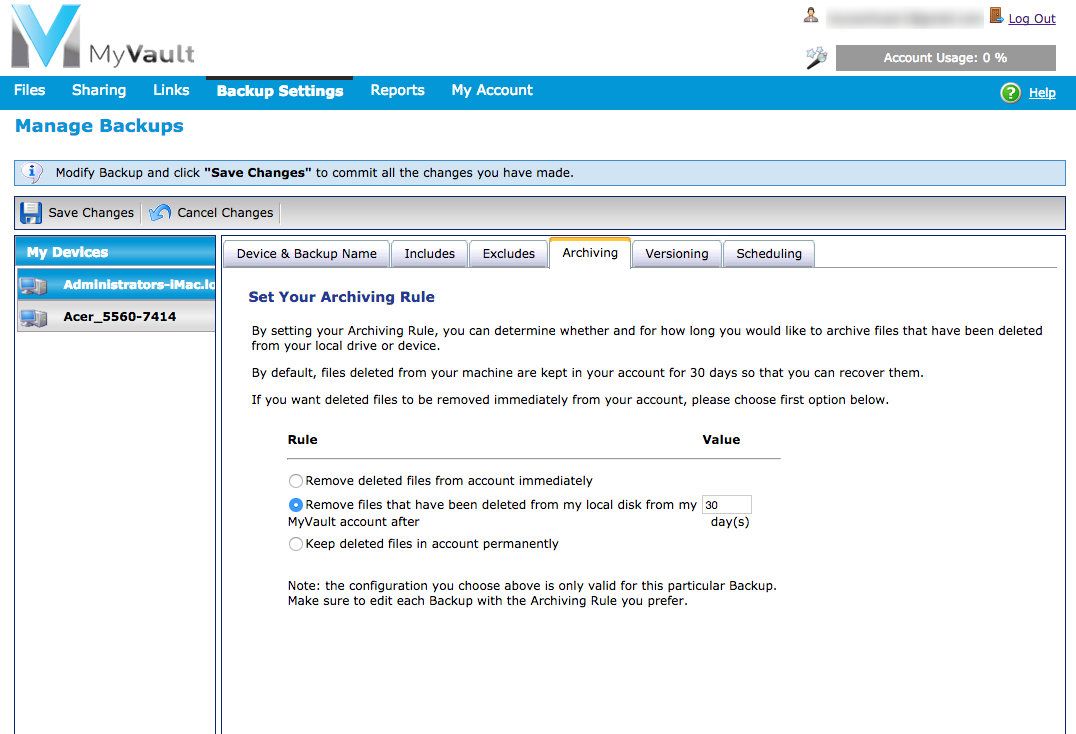
- Step 7: Set Your Archiving Rule
You have three major options for archiving:
1. Remove deleted files from account immediately. Checking this means that anything you delete locally will be deleted immediately from the web. You will not be able to restore it.
2. Set the number of days that file archives are kept. The default for this is 30 days. You can change the number of days by selecting this option and entering a different value in the value column.
3. Permanently keep all archives of files. This will keep any file you save, as well as aditions/changes to that file. This is useful if you need to keep a long-term track of all your work.
- Step 8
Save your changes by clicking on the Save Changes tab in the top left bar. You can also cancel any changes you have made, by clicking on the Cancel Changes tab.
Important Note: any changes that you make only apply to the backup you selected in Step 5. This allows you the flexibility to set different archiving rules for different files/folders according to your needs.
What is "versioning"?
When you edit a file, you sometimes want to keep track of all the progression of the changes and would like to keep the old file while saving the new file. Versioning makes this process easy. MyVault® automatically makes and keeps versions, and you can set the versioning rules by following the steps below:
How to set versioning rules?
- Step 1: Log In to MyVault
Log in to your MyVault account online by going here
Login Page
- Step 2: Go Inside MyVault
Click on the MyVault Tab at the top of the page
Account Page
- Step 3: Go to Backup Settings
Click on on Backup Settings Tab
- Step 4
Click on Manage Device Backups. This will take you to a list of your backup jobs.
- Step 5
Click on the backup job for which you want to change the rule, to highlight it. Then click on the Edit Job button in the toolbar.
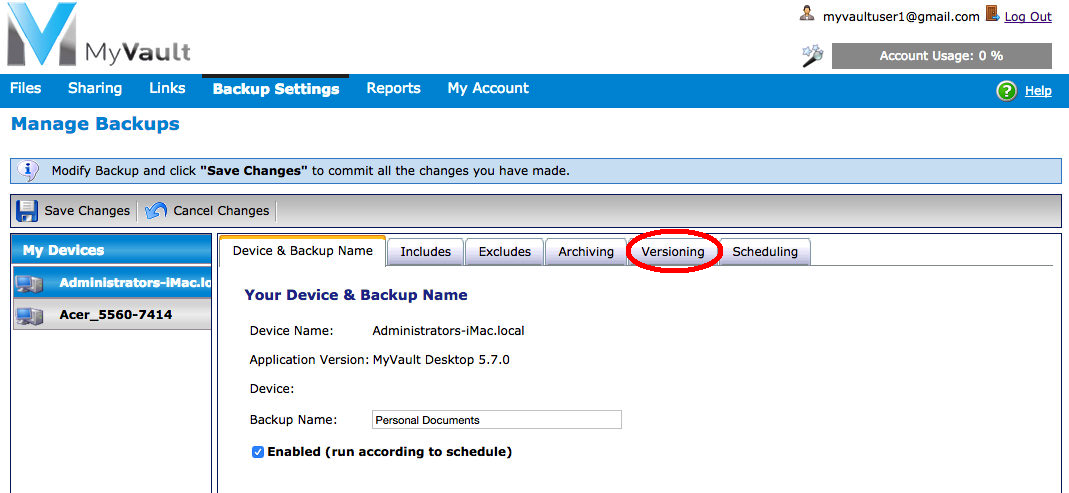
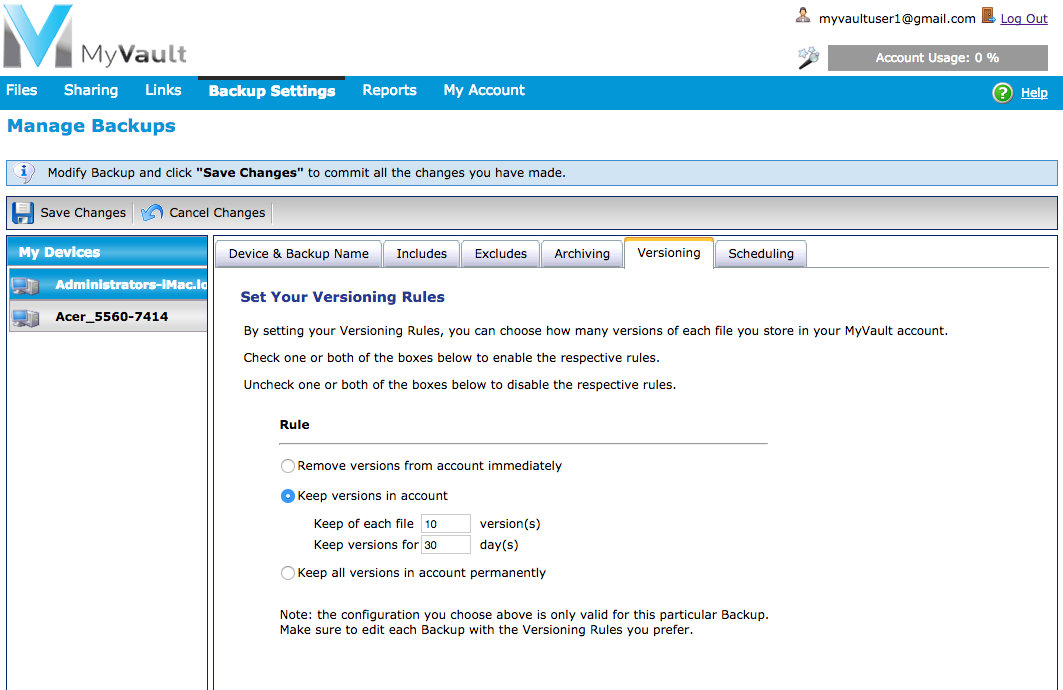
- Step 6: Go to Versioning Options
Click on the Versioning tab.
- Step 7: Set Your Versioning Rules
If you don't want to keep any versions, click the radio-button next to "Remove versions from account immediately. Remember if you are archiving your files, you will still be backing up the latest edits, you just won't keep copies of previous edits.
If you wish to keep track of all versions (i.e. of every change you make to a file) select the radio-button next to "Keep all versions in account permanently". Take note that this option, although it keeps track of all versions, can quickly increase the need for space, especially with frequent changes to large files.
You can set other version preferences by determining how many versions of each file you'd like to keep, and for how long you'd like to keep versions. The default is keeping the last 10 edits/versions of a file, and saving versions for 30 days before clearing them out.
- Step 8
Save your changes by clicking on the Save Changes tab in the top left bar. You can also cancel any changes you have made, by clicking on the Cancel Changes tab.
Important Note: any changes that you make only apply to the backup you selected in Step 5. This allows you the flexibility to set different versioning rules for different files/folders according to your needs.